
Escape from Tarkov: A Detailed Guide for Beginners (2026)
This information is current as of August 2026 (game version 1.1).
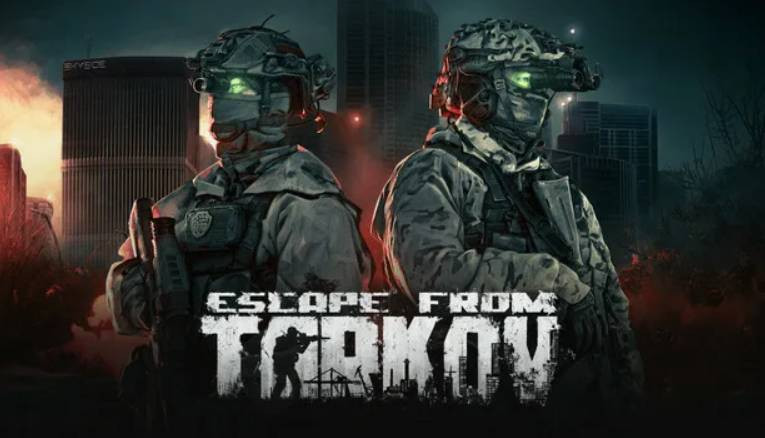
Escape from Tarkov is a hardcore online survival shooter from Battlestate Games. After nearly ten years of testing, the game was officially released on November 15, 2025, and continues to receive regular updates: In 2026, the “Icebreaker” and “Terminal” locations were added, along with new weapon calibers, the KORD BREACH Battle Pass, and modes for seasonal characters. Tarkov’s main feature is raids: you enter a location with your gear, and if you die, you lose almost everything you brought with you. This guide will help new players get the hang of the game and stop losing gear unnecessarily.
Game Modes
When you launch the game, you choose one of three modes:
| Mode | Description | Who It's For |
|---|---|---|
| PvP | Classic Tarkov: a permanent character, raids against live players and AI | The main mode for everyone |
| PvP Season | Seasonal character with separate progression and a battle pass KORD BREACH | For those who like to start from scratch and compete |
| PVE ZONE | Co-op mode against bots without other players; local raids available | For new players to explore maps and complete quests |
Tip: Start with the PVE ZONE. There, you can take your time learning the locations, exit points, and mechanics without giving away your gear to other players. Quest progress in local PVE raids is saved even if the client crashes.
BEAR or USEC: Which to Choose
The two PMC factions differ mainly in cosmetic aspects: voice acting, appearance, and starting gear. BEAR is a Russian PMC; USEC is a Western one. There’s no fundamental difference in gameplay, but keep two things in mind:
- Renegade bots and some AI factions may react differently to your faction within specific story chapters;
- Merchant Ref and certain missions may require you to kill fighters from a specific faction—it’s easier to play as a single faction when playing with friends.
Choose the faction you like best visually—you can now customize your character’s appearance and voice in the “Character” section.
How Raids Work
A raid is a time-limited mission (25 to 50 minutes, depending on the map). Your goal is to complete objectives, collect loot, and reach the exit point. Key rules:
- Double-tap the O key to open the list of exits. Some exits have requirements: payment, signaling, or not having a backpack.
- The “Killed” status means you lose all your equipment except for the contents of a secure container (stash).
- A stash is a secure container whose contents are preserved even after death. Store your most valuable items there: keycards, documents, and rare items for missions.
- Insurance from the Standard-Bearer or the Therapist returns your gear if no one has looted it from your body. Insure anything you’d hate to lose—the return usually comes after one day of in-game time.
- You earn experience for a raid even if you die—with a 0.75 modifier—so death doesn’t completely reset your progress.
Health and Healing
A character’s body is divided into 7 parts, each with its own health pool: head, chest, abdomen, arms, and legs. If the head or chest is destroyed, the character dies. Major conditions and their treatments:
| Problem | Effect | How to Treat |
|---|---|---|
| Mild Bleeding | Gradual health loss | Bandage, AI-2 First Aid Kit |
| Severe bleeding | Rapid loss of health, blood trail | Tourniquet, hemostatic agent, Salewa |
| Fracture | Limping, penalties to aim | Splint, Grizzly |
| Pain | Sight shake, blurred vision | Painkiller, morphine |
| Hunger and Thirst | Energy and hydration levels dropping to lethal levels | Food and water during or after the raid |
Tip: Always bring at least one Salewa first-aid kit or IFAK, a tourniquet, and painkillers on a raid. It’s best to take the painkiller in advance of an expected firefight—it removes the penalties from wounds for a few minutes.
Gear for Beginners: A Budget Setup
The main mistake beginners make is bringing expensive gear on raids that they don’t yet know how to use effectively. Start with budget setups costing 50,000–80,000 rubles:
- A Class 3–4 body armor vest—for example, a 6B23 or a used pressed-plate vest from a flea market;
- A helmet with headphones or separate active headphones—Comtac, GSSh, or similar models. Sound is crucial in Tarkov: headphones amplify the enemy’s footsteps and rustling sounds;
- A load-bearing vest with pouches for magazines and a first-aid kit;
- A medium-sized backpack—a huge backpack makes you slower and more visible;
- Weapon—an inexpensive SKS carbine, AK-74M, or an MP-133 hunting rifle with a rifled barrel.
The rule is simple: put together a setup that you wouldn’t mind losing five times in a row. The game’s economy is built around the cycle of “earning enough from a few raids—then spending it all on one good run.”
Weapons and Ammo: Which Is More Important
In Tarkov, it’s not the gun that matters—it’s the ammo. An expensive rifle with cheap ammo is useless against armor, while a simple AK with armor-piercing rounds is dangerous to any opponent. Starting guidelines:
| Caliber | Available Ammo | Comment |
|---|---|---|
| 5.45x39 | PS, then BP | Inexpensive weapon, huge ammunition reserves |
| 7.62x39 | PS | Good damage, the SKS carbine—a classic choice for beginners |
| 9x19 | Pst GZH | Pistols and submachine guns—aim for the legs against unarmored targets |
| 12/70 | Shot, bullet | Shotguns are devastating at close range |
| 5.56x45 | M855, later M855A1 | Western weapons are more expensive to maintain |
Against armored targets, aim for unprotected areas—the face and legs. The famous “headshot” works against most low-tier helmets with face shields.
First Locations: Where to Go as a Newbie
| Location | Features | Recommendation |
|---|---|---|
| Factory | Small map, quick raids, close-quarters combat | Shooting practice and fast farming |
| Customs | Flag starting missions, moderate danger | The main map for new players to level up |
| Forest | Long distances, snipers, Old Man boss | Proceed after exploring the map in PVE |
| Coast | A resort with rich loot and lots of players | Mid-level farming |
| The Streets of Tarkov | A huge city with a high density of loot and combat | Only for players with a good PC and experience |
| Laboratory | A locked map accessible via a key card, featuring elite loot | Endgame Content |
The progression is simple: The Factory to get a feel for combat, Customs for quests, then the Forest and the Coast. Start by exploring all maps in the PVE ZONE or on an offline raid: knowing the exit points and spawn locations is more important than shooting skills.
Merchants and Quests
Quests are the main source of experience, reputation with merchants, and access to the best goods. There are eight merchants, each with their own specialization:
| Merchant | What They Sell | How to Unlock |
|---|---|---|
| Flag | Soviet-caliber weapons and ammunition, insurance | Immediately, first missions |
| General Practitioner | Medicine, insurance, food sales | Right away |
| Buyer | Buys everything, but cheaply | Immediately |
| Flea market vendor | Armor, clothing, surplus goods, barter | Quest from the Flag |
| Peacekeeper | Western weapons and gear for dollars | Quest from Prapor |
| Mechanic | Weapon Modifications and Builds | Quest from Prapor |
| Hunter | Hunting Weapons, Survival Gear | "Introduction" Quest |
| Ref | EFT Rewards: Arena, Rare Gear | Through quests and the arena |
Each merchant has loyalty levels (up to Level 4) that increase as you complete quests and trade more. High loyalty unlocks better ammo, armor, and unique barter items. That’s why quests are the top priority: first, complete the Banner’s main questline, then tackle the side quests from the others.
Flea Market
The Flea Market is a player-to-player auction where you can buy and sell almost any item for in-game rubles. It unlocks as you level up your character. Basic rules for using it:
- Only sell raid loot to the flea market vendor if the price on the flea market isn’t significantly higher—check before selling;
- Items marked as “found in a raid” are needed for many quests and Vault modules—don’t rush to sell rare items;
- Prices fluctuate wildly at the start of the season: basic ammo and armor become more expensive, while junk for quests can skyrocket tenfold.
Vault
The Vault is your base outside of raids. Modules provide passive bonuses: health regeneration, item crafting, and skill bonuses. For a beginner, the priority is as follows:
- Generator—without it, most modules won’t work;
- Infirmary—healing after raids and crafting medicine;
- Water Collector and Food Station—satisfy hunger and thirst;
- Workbench — crafts ammo and items for quests;
- Reconnaissance Center — speeds up the return of insurance points and skill leveling.
Modules require items found during raids, so collect “junk”: nuts, bolts, light bulbs, tools—you’ll need all of this for construction.
Playing as the Scav
Scav Raid (scav) — a free way to earn money. You spawn on the map in the middle of the raid with random gear, and all the loot you carry out goes to your main character. Key points:
- Wild bots won’t attack you until you kill one of them;
- Your reputation with the Dealer increases for peaceful play and for exiting through shared checkpoints with the PMC, and decreases for killing Wilds;
- High reputation reduces the cooldown for the Wild raid and improves your starting gear;
- In the PVE ZONE, you can play as a Wild character solo on your local computer—quickly and without waiting in lines.
Take advantage of every available Wild raid—it’s a stable source of income with no risk to your main character.
Ten Tips for Beginners
- Complete your first 10–15 raids in PVE ZONE—learn the maps and exit routes without taking any damage.
- Always insure your gear: half of the insurance premium is refunded regularly.
- Listen to the game. The sound of footsteps, reloading, and doors opening will give you a heads-up on enemies before you see them.
- Don’t run across open terrain—move in short bursts between cover.
- Hunger and thirst kill silently: keep an eye on your energy and water bars.
- Ammo is more important than weapons—conserve your gun, not your ammo.
- Immediately stash any quest items you find in your stash.
- Don’t be greedy: once your backpack is full of valuable loot, head for the exit instead of chasing the next checkpoint.
- Complete the Banner quests from the very first raids—they unlock the other merchants.
- Death is part of the game. Even experienced players survive only about half of the raids.
Conclusion
Escape from Tarkov is only intimidating in the first few days. Start with PVE mode, get familiar with the Plant and Customs, complete merchant missions, and don’t carry anything you’d hate to lose. In a couple of weeks, you’ll be navigating the maps with confidence, putting together functional, budget-friendly gear sets, and coming out of raids with a profit. Tarkov is patient with those who are patient with it.